https://www.iperiusbackup.com/cms/iperius-backup-tutorials.aspx
Iperius is a very flexible backup software and includes a complete feature set for Cloud Backup. It allows to make online backups to Azure Storage, that’s part of the Microsoft cloud platform. Azure backup can be made in a fully automated way, and includes powerful integrated features, such as database backup, open file backup (VSS), compression and encryption, email notifications, etc.
In addition to Microsoft Azure, Iperius also supports all the major cloud storage services: Amazon S3, OneDrive, Google Drive and Dropbox.
In this tutorial you will see how simple is the remote backup to Azure Storage with Iperius.
In the program main window, create a new backup job:
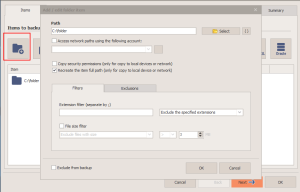
Add the files and folders you want to back up to Azure:
When you add a destination to a cloud storage like Azure, you first need to create a specific account into Iperius. To do that, you have to obtain the special credentials provided in the Microsoft Azure management console (Microsoft Azure requires a subscription that allows to try all the Azure features for a trial period).
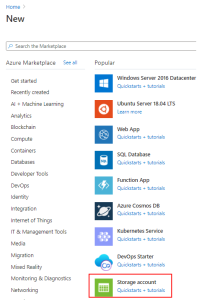
After you created an Azure account (or if you already have one), access your management console at this URL: https://portal.azure.com/#home . Here you can activate the “Storage” feature, create custom “Containers” where to put your files, make uploads and downloads using a cushy web interface. To make Iperius able to send files to this space, you must copy the authentication codes and paste them in the account creation into Iperius. You can see in the image below where to find these codes:
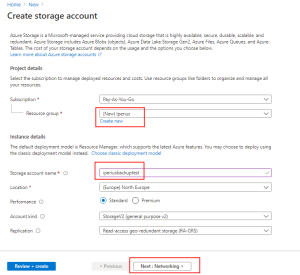
In “Resource Groups” choose an identifier that can be used by Azure Resource Manager to group resources.
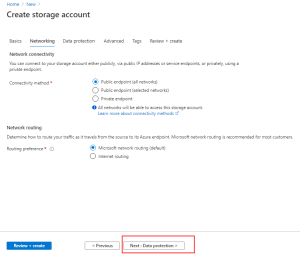
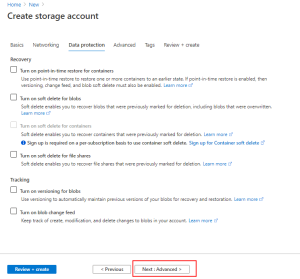
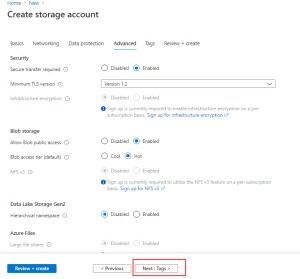
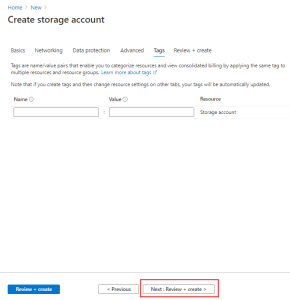
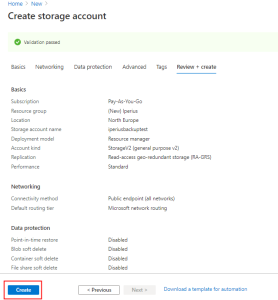
Then, leave all the option to default value clicking on “Next” as the images below.
Once the storage is created you can find the key to use inside Iperius as shown in the following images:
Once you’ve got the account name and the access key, add a cloud destination into Iperius, and create a new Microsoft Azure account.
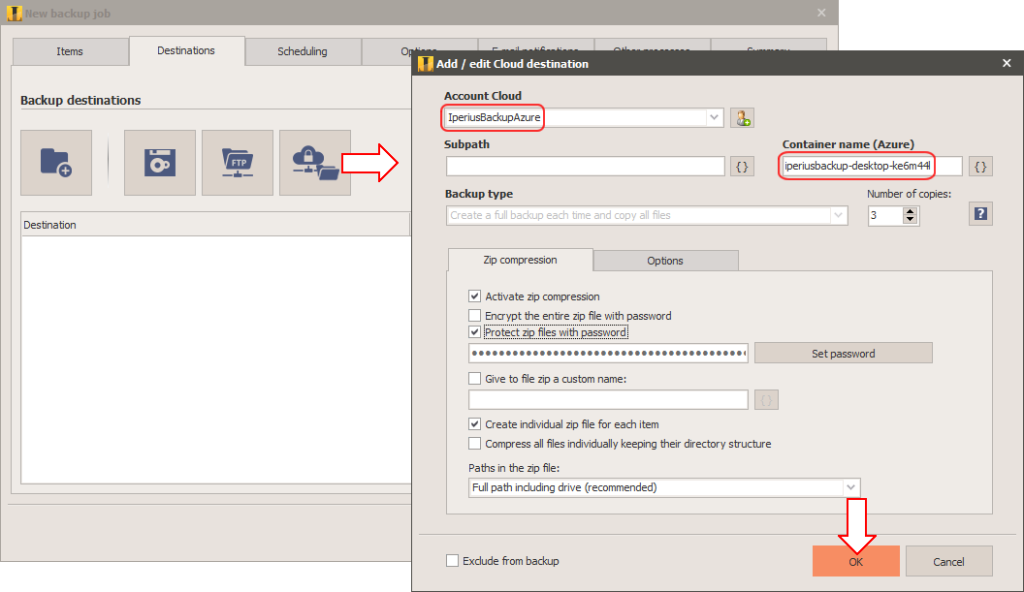
As you can see in the picture below, you have to select an account from the dropdown list. To add or modify an account, simply click on the dedicated button near the list. In this window you can easily configure all the destination settings, such as the Container name, the number of copies to keep, the AES encryption and/or zip password, the bandwidth limitation, etc.
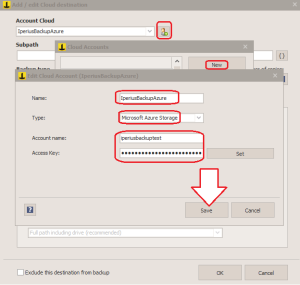
You can see in the image below how to create a Microsoft Azure account inserting the authentication data you got from the Azure management console:
Click on the button “Save” to create the account you just configured.
In the next panels, you can configure a scheduler to run the backup automatically at specific days and times, and email notifications, to be always informed about backup result and possible errors.
Read the related tutorials to see how to configure these options:
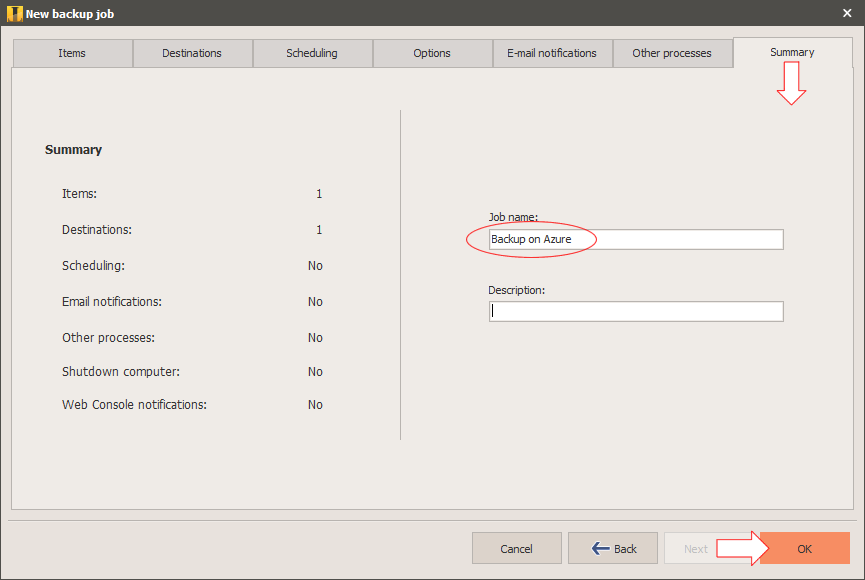
In the final panel, choose a name for your backup job and click OK to save it.
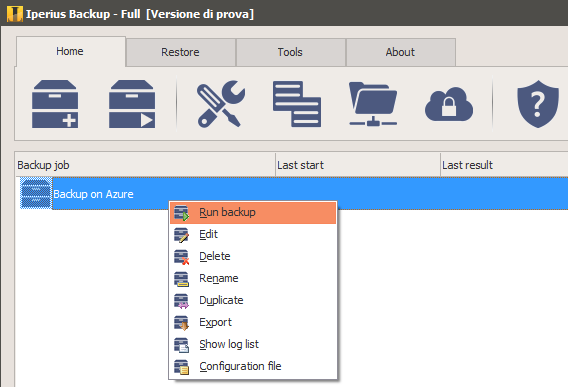
Once the backup job has been saved and is in the list, you can immediately run it by right clicking on it.
Thanks to the Azure backup, you can automate in a very simple way an online backup of your important documents and files. Moreover, you can back up databases like SQL Server or MySQL to a secure and remote cloud with the maximum security available today, thanks to the secure protocol HTTPS, the AES encryption and the fact that your backup will be in a different geographical location, safe from thieves, hardware failures and natural disasters.





Hello ,
Looking for your product I want to know :
Iperuis can backup from Azure to Azure ?? i look for a product whith this feature to back up my Azure files & Folders , more my SQL Azure Database .
Thank you in advance
No, a direct backup from Azure to Azure is not possible. However, this feature could be added in future versions if technically possible.
Hello,
amazing informative post for azure backup. Thanks for sharing this post.
Add the correct name and key after the error, prompt
HTTP request failed with code 400, message is The account being accessed does not support
Hi,
We will continue the conversation by ticket.