https://www.iperiusbackup.com/cms/iperius-backup-tutorials.aspx
Backblaze (https://www.backblaze.com/) is a popular cloud storage service based in the United States. The service consists of an online backup space where you can save any type of file, using a client software to be installed on the local computer, which takes care of uploading and therefore backing up the data.
Backblaze security and reliability features make it an optimal solution for offsite backup of personal and business data. Among these features, we must first highlight redundancy, i.e. the fact that each uploaded file is stored redundantly on multiple units, on multiple servers and in multiple locations in the data center. Backblaze data centers are located in the United States (3) and Europe (1).
To further expand its offer and to also meet third-party software, Backblaze also supports the S3 protocol, effectively placing itself in direct competition with Amazon S3 Storage, with which it has always had a rivalry in terms of cost (lower) and popularity. Compatibility with the S3 protocol makes Backblaze perfectly usable with Iperius Backup, which supports any S3 compatible storage. We remember that Iperius also supports Wasabi, Aruba Cloud, Amazon S3, Minio, etc … Iperius also offers its S3 storage service (Iperius Storage S3) on TIER III and TIER IV datacenters, with advanced features, which can be purchased and activated from official website: https://www.iperiusstorage.com
Iperius is an excellent choice for backing up to Backblaze, because it adds enterprise-class features to simple file backup. Iperius can in fact perform drive image backups, backup of VMware ESXi and Hyper-V virtual machines, backup of databases such as SQL Server and MySQL, backup of Microsoft Exchange mail servers and Office 365. Iperius Backup can therefore significantly increase the completeness and the effectiveness of cloud backup on Backblaze, especially for companies and server environments.
In this short tutorial you will see how easy it is to perform a backup of folders on a Backblaze storage space, using the S3 protocol.
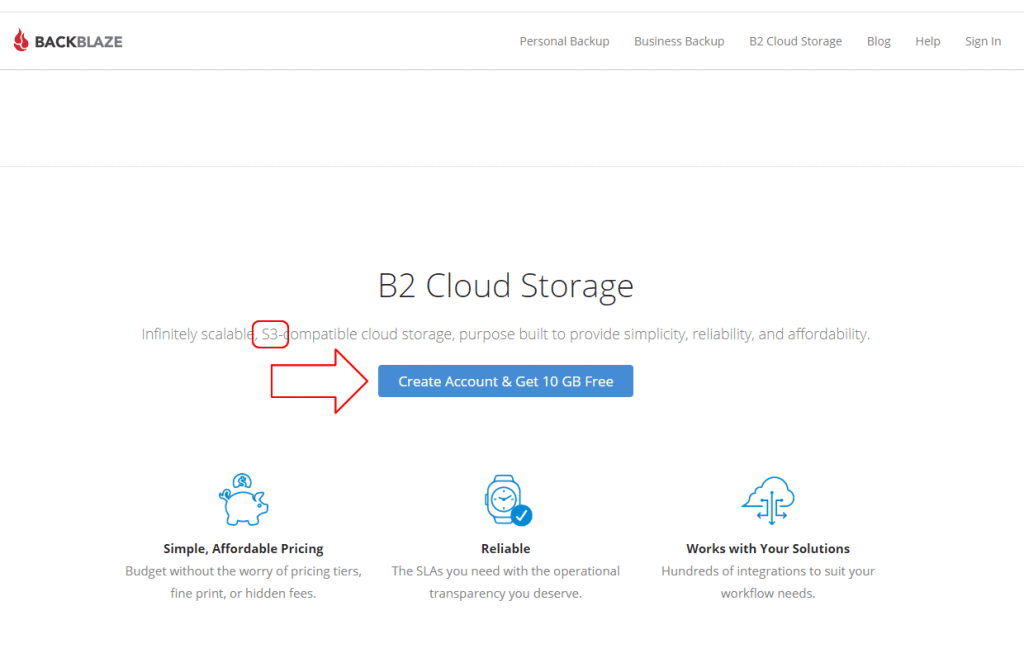
The first thing to do is to create a test account on Backblaze, and configure the access keys to authenticate and upload. From the main page of the official site https://www.backblaze.com/, create a new 10 GB storage test space, as shown in the image below:
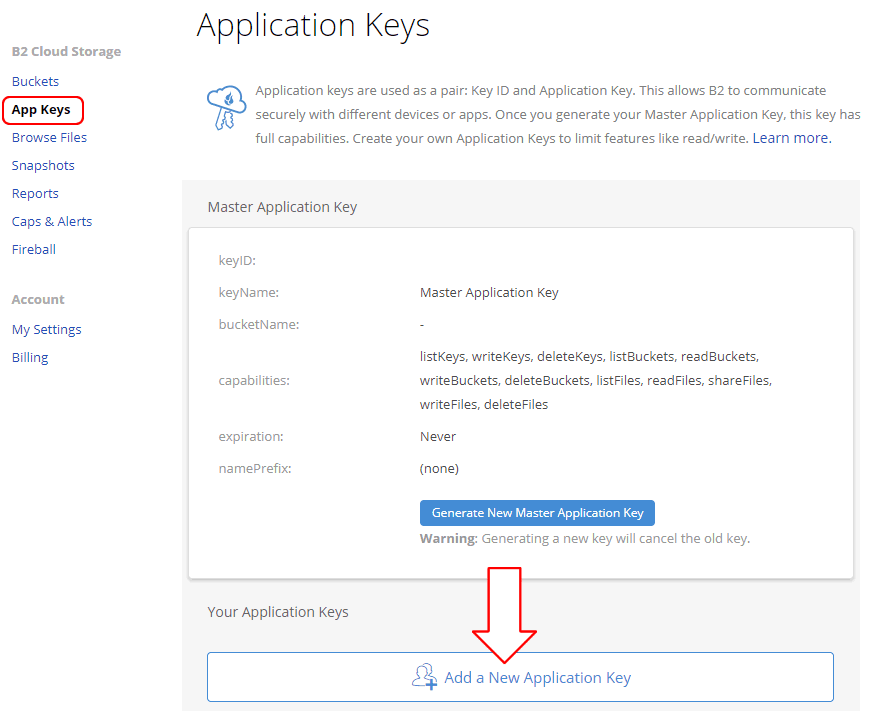
You will have to specify an e-mail address and a password, and subsequently, a mobile phone number in order to receive a confirmation code and activate the account. Once this is done, go to the configuration panel and then to the section where you can create S3 credentials:
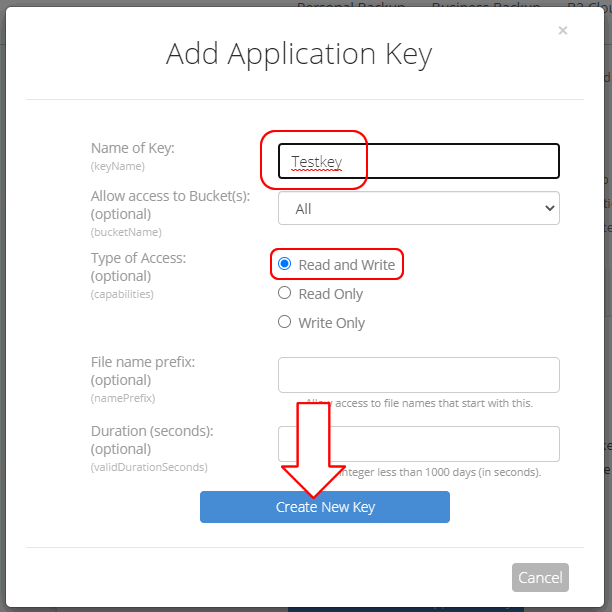
Click on “Add a New Application Key” and then specify the required fields as shown in the image below, then click on “Create New Key”:
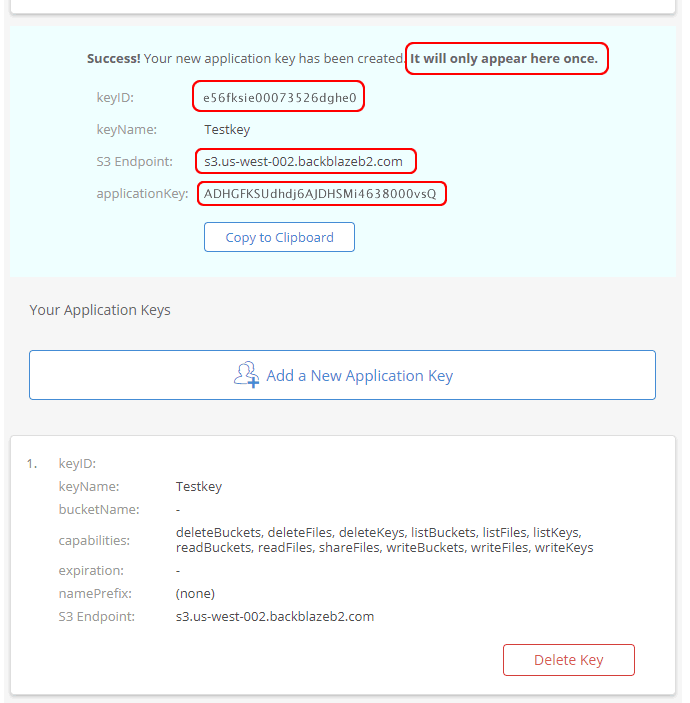
As soon as the credentials are created, it will be possible to copy them and use them within Iperius. The password is only shown at this time, then it will no longer be visible. It will therefore be necessary to save it in a safe place, otherwise it will not be possible to recover it (if necessary, new credentials will have to be generated). The data to take note of are the keyID, the applicationKey and the S3 Endpoint address.
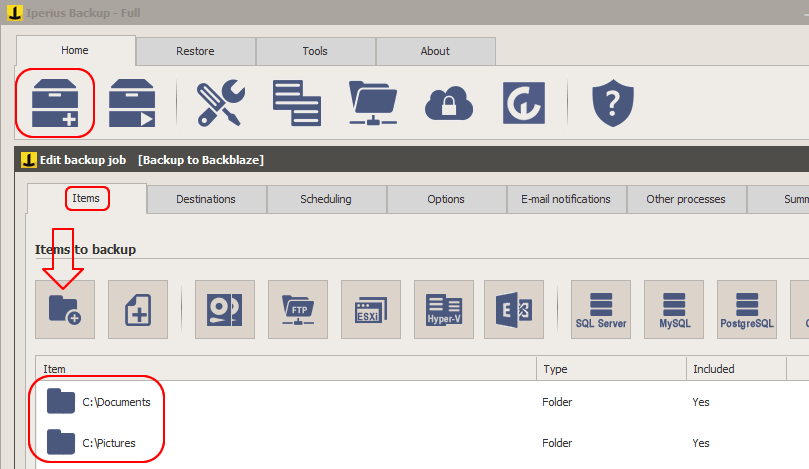
Now that our Backblaze account has been created and configured, let’s open Iperius and create a new backup job. Then add the folders you want to back up in the list of items:
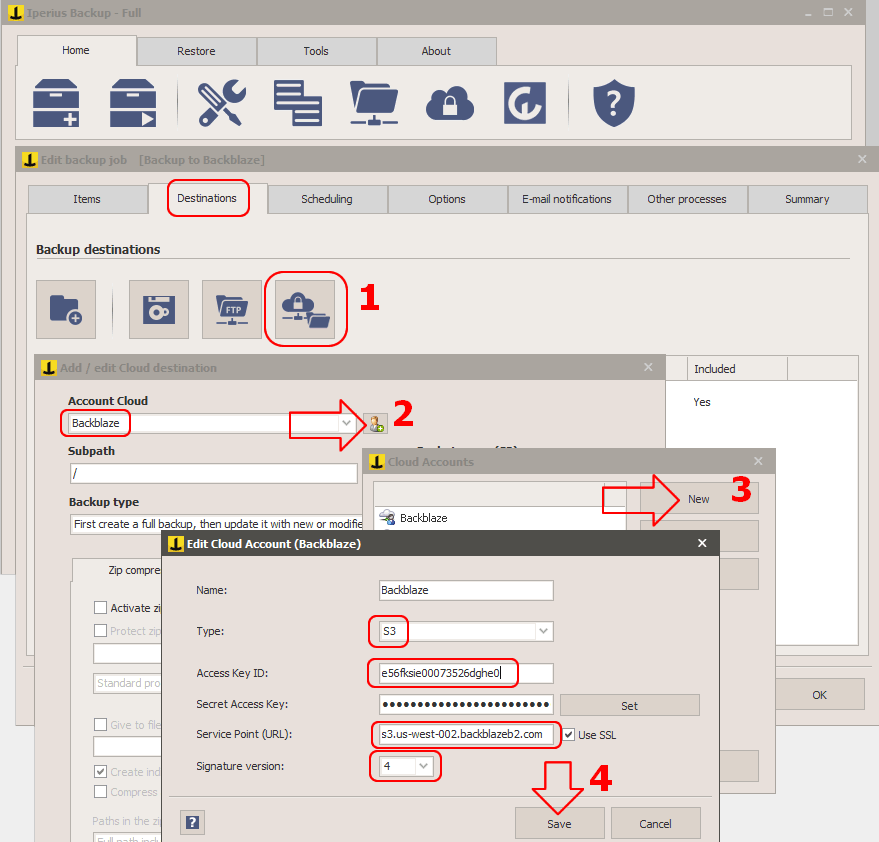
In the next panel, “Destinations”, you will add a cloud destination and the related S3 account. In the image below you can see all the steps to add an S3 account with the Backblaze parameters:
Once the account has been added and saved, you can proceed to set the various destination options, such as the bucket name, the type of backup (full, incremental or differential), zip compression, etc.
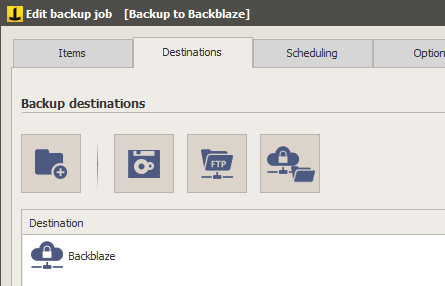
Then save the destination by clicking on OK. You will then have your Backblaze destination in the list of destinations:
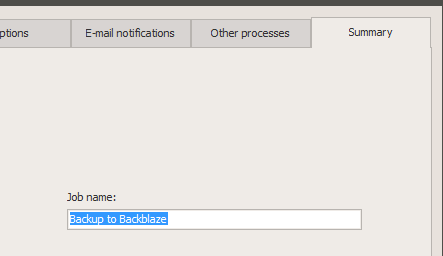
You can then proceed with the subsequent settings of the backup job, i.e. the schedule (to perform the backup in automatic mode based on days and times), the advanced settings, the email notifications and the execution of other processes. Once the configuration is complete, you can save the backup operation by giving it a name and clicking on “OK”:
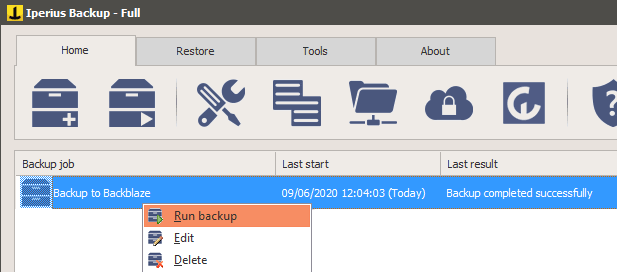
You can then back up immediately, by right clicking on the just created backup job:
The tutorial has ended. We have seen how easy it is to perform an automatic backup on Backblaze, with the aim of having a secure copy of the data on a professional and always accessible offsite storage. Recall that, in addition to the basic functionality of Backblaze, Iperius offers very powerful features for backing up disk images, VMware ESXi and Hyper-V virtual machines, Exchange mail servers and Office 365. Iperius Backup and Backblaze S3 are an extremely powerful and complete combination to protect the IT infrastructure of any company, with absolutely competitive costs.
Finally, let’s not forget that Iperius in turn offers its Storage S3 service on advanced TIER IV datacenters, which allows you to perform the same operations that you can do with Backblaze S3, but offering a unified interface for license management and a web console for viewing and downloading files. The service is Iperius Storage S3, and can be purchased and activated from the official website: https://www.iperiusstorage.com

PLEASE NOTE: if you need technical support or have any sales or technical question, don't use comments. Instead open a TICKET here: https://www.iperiusbackup.com/contact.aspx
**********************************************************************************
PLEASE NOTE: if you need technical support or have any sales or technical question, don't use comments. Instead open a TICKET here: https://www.iperiusbackup.com/contact.aspx
*****************************************