https://www.iperiusbackup.com/cms/iperius-backup-tutorials.aspx
Iperius Backup 7.0 has introduced many important updates for its own Iperius Recovery Environment®: Iperius Disk Cloning, a free software to clone hard disks, and the possibility to receive remote support directly during the bare-metal restore, after booting the machine with the Iperius recovery media.
To know how to create a bootable CD/DVD or a USB key containing Iperius Recovery Environment, read this tutorial: https://www.iperiusbackup.net/en/create-recovery-drive-usb-recovery-disc-iso-iperius/
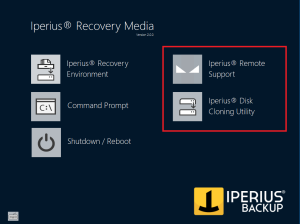
Here are some additional information about these new features of Iperius Recovery Environment® (see picture above):
- Iperius Remote Support: now it’s possible to open and connect Iperius Remote in receive mode inside the recovery environment, making Iperius Backup the only software that allows users to receive remote support directly during the restore process. The less experienced user, who has to perform bare metal restore of a drive image backup, or clone a hard disk, will now be able to request technical assistance, allowing the operator to connect remotely directly to his boot environment and guide him through the whole process.
- Iperius Disk Cloning Utility: a freeware software that allows disk-to-disk cloning, performing a cloning process that recreates exactly the source disk into the destination disk. Actually, it’s a free software to clone the hard disk, perhaps to move the operative system to a larger disk or cloning a hard disk to SSD.
In this tutorial we will talk about the second feature, showing how to clone a hard disk to another disk.
1) Running Iperius Disk Cloning Utility
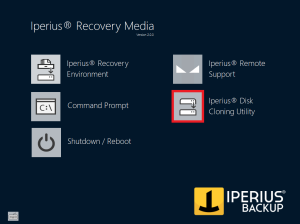
After starting Iperius Recovery Environment from a USB key or an optical device (CD or DVD), just click on the “Iperius Disk Cloning Utility” icon (inside the red box in the picture above) to open the main window of the software.
2) Selecting source and destination disks
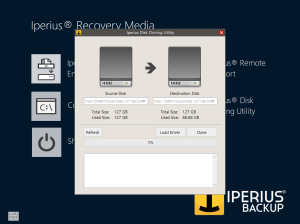
After running Iperius Disk Cloning Utility the following window will prompt:
As you can see from the picture, the software provides a simple and intuitive interface, where you can select the source disk (on the left) and the destination disk (on the right).
Under each selected disk you can see its dimension, expressed in terms of total size and used size.
Furthermore, from left to right, you can see three buttons:
– Refresh: to update the disks list;
– Load Driver: to load a driver in real-time by its own .inf file in order to see also devices that need additional drivers to be detected (RAID controller, SCSI, etc.);
– Clone: to start the cloning process from the source disk to the destination disk.
3) Selection of the Source Disk
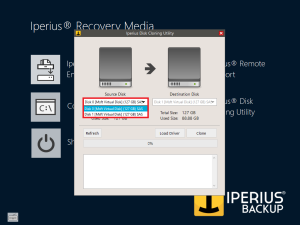
By clicking on the drop-down menu on the left, under the “Source Disk” label, you will be able to see the list of the disks connected to the system and choose the disk you want to clone (see following picture):
Once chosen the disk you want to clone, you can just click it to apply the selection.
4) Selection of the Destination Disk
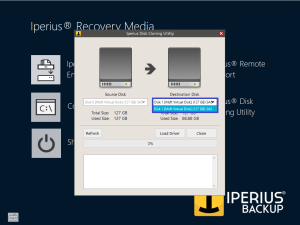
By clicking on the drop-down menu on the right, under the “Destination Disk” label, you will see the list of the disks connected to the system, excepted the one already selected in the left menu (obviously, you can’t clone a disk inside itself !), as shown in the picture below:
So, let’s choose the destination disk, making sure that its totale size is at least equal or greater than the source disk. Then, let’s click it to confirm the selection.
5) Starting the cloning process
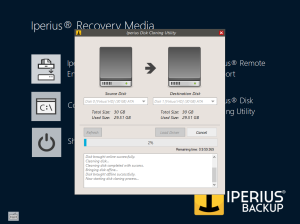
At this point, you will just have to click the “Clone” button to start the cloning process.
In the white box under the progress bar, some steps of the process will be described, while on the right you can see a timer showing the estimated time for the end of the cloning process.
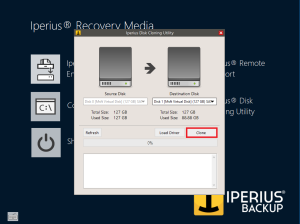
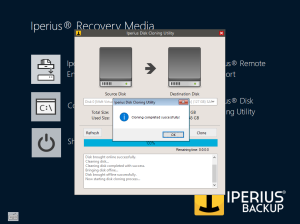
At the end of the process, you can just click the “Ok” button (see picture below) and close Iperius Cloning Utility using the close icon on the top-right; then click the “Shutdown/Reboot” icon on the main page of the recovery environment in order to reboot or turn off the PC.
In this tutorial we’ve seen how to perform a disk-to-disk cloning in a few simple steps, creating a copy of the disk that is identical to the source.
Iperius Disk Cloning Utility is a powerful tool to perform the backup of your hard disks towards other disks. You can easily clone hard disks connected to the system and also USB disks, and above all this powerful feature is provided completely free by Iperius Backup. Iperius Disk Cloning Utility is a freeware software to clone your hard disk, going to complete the great selection of backup and data protection features given by Iperius.
Recall also that with Iperius Backup you can perform drive image backup and bare metal restore with great ease. Furthermore, Iperius is an essential tool to convert physical machines into virtual machines (P2V).
Have a look to our tutorial about that: https://www.iperiusbackup.net/drive-image-backup-immagine-disco-p2v-disk-cloning-iperius/

PLEASE NOTE: if you need technical support or have any sales or technical question, don't use comments. Instead open a TICKET here: https://www.iperiusbackup.com/contact.aspx
**********************************************************************************
PLEASE NOTE: if you need technical support or have any sales or technical question, don't use comments. Instead open a TICKET here: https://www.iperiusbackup.com/contact.aspx
*****************************************